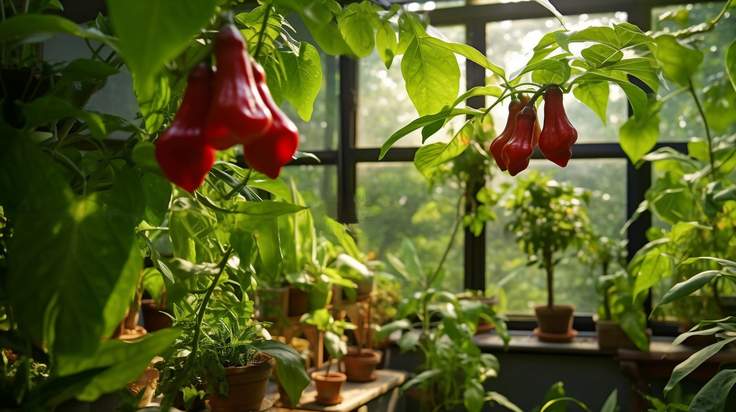
How To Grow Bishop's Crown Peppers - The Ultimate Guide

If you’re a chilli enthusiast looking to add some fiery zest to your garden and kitchen, growing bishop's crown peppers is an exciting endeavor. Known for being unique shape and mild heat make it a favorite for many pepper enthusiasts, these delights will soon be growing right in your backyard or home. Let’explore their unique characteristics, nutritional benefits, and culinary uses. With our expert advice and personal experiences, you’ll soon be reaping a bountiful harvest of these flavor-packed peppers.
Selecting the Right Location and Soil Preparation
For your bishop's crown peppers to thrive, choose a sunny spot in your garden or on your balcony that receives at least 6-8 hours of direct sunlight daily. These peppers love warm temperatures and require a growing season with temperatures above 70°F (21°C). The plant itself reaches a height of 5 cm and has an average width of 3 cm.
Prepare the soil carefully, as these peppers prefer 6.2-7.0 pH soil. Incorporate organic matter like compost to improve soil fertility and drainage, ensuring the best growing conditions for your pepper plants.
Starting from Seeds and Transplanting
Begin your pepper-growing journey by sowing the bishop's crown peppers seeds in small pots or seed trays. Plant the seeds about 1/4 inch deep and keep them warm and moist to aid germination. Under optimal conditions, germination usually takes 10-20 days. Once the seedlings develop a few true leaves, transplant them to larger containers, allowing sufficient spacing between plants to promote healthy growth and prevent pepper cross-pollination .
Watering, Fertilizing, and Pruning
For the succesful growth of bishop's crown peppers, consistent watering is crucial. These peppers require regular watering, and the soil should be kept consistently moist. Be cautious not to overwater , as excessive moisture can lead to root rot. Additionally, mulching around the plants can help retain soil moisture and reduce water evaporation.
Feed your bishop's crown pepper plants every two weeks with a balanced, water-soluble fertilizer during the growing season. When aiming for pepper plant nutrition , go for a fertilizer with nutrients in balanced ratios to promote both foliage and fruit development. Proper pruning is also essential to encourage bushier growth and improve air circulation around the plants. Pinch off the tips of young plants to promote branching and remove any damaged or diseased leaves.
Pest and Disease Control
bishop's crown peppers are generally hardy, but like all plants, they can face challenges from pests and diseases . Keep a close eye on your pepper plants for signs of common pests such as aphids and thrips. If infestations occur, consider using insecticidal soap or neem oil to control them effectively.
Similarly, watch for any signs of diseases, such as powdery mildew. If necessary, apply a suitable fungicide according to the instructions to prevent the spread of disease and ensure the health of your plants.
Flowering and Fruit Maturation
Around 90 to 150 days after transplanting, your bishop's crown pepper plants will start flowering. These plants are typically self-pollinating, but cross-pollination can occur in some cases. The flowers can be light green, adding a visual aesthetic to your garden.
Fruit maturation usually takes approximately 2 to 3 months from flowering to ripe fruit. The peppers will turn red to yellow when fully ripe and are ready for harvest. Gently twist or cut the peppers off the plant, leaving a short stem intact.
Culinary Uses and Nutritional Content
bishop's crown peppers are prized for their flavor, making them perfect for culinary exploration.
In addition to their culinary benefits, these peppers are packed with nutritional goodness. They are rich sources of vitamins A and C, as well as antioxidants that promote overall health and well-being.
If you are looking for tasty pepper dishes, be sure to check out our recipes section.
Storing and Preservation
Once you’ve harvested your bishop's crown peppers, you can store them in a cool, dry place. Alternatively, you can explore different preservation methods such as drying or pickling to prolong their shelf life. Preserved peppers can be used in cooking throughout the year, so that you always have an ample supply of on hand.
If you liked this article, check out our other pepper growing guides like How To Grow Cherry Pepper Peppers - The Ultimate Guide or How To Grow Apocalypse Scorpion Peppers - The Ultimate Guide for more tips.
Now that you possess a comprehensive understanding of how to grow bishop's crown peppers, you are well-equipped to embark on your pepper growing adventure. Follow the expert tips, ensure the right growing conditions, and care for your pepper plants with attention to detail. You’ll soon enjoy a flourishing pepper garden that adds zest, flavo and possibly some spice to your dishes year-round. Happy growing!
Frequently Asked Questions (FAQs)
How long does it take for bishop's crown peppers to germinate from seeds?
bishop's crown peppers typically take 10-20 days to germinate from seeds under optimal conditions.
Can I grow bishop's crown peppers indoors?
Yes, you can grow bishop's crown peppers indoors using pots or containers, provided they receive ample sunlight and warmth.
What is the Scoville Heat Scale rating of bishop's crown?
bishop's crown have a medium level, in the heat range of 5,000-30,000 shu (Scoville Heat Units).
How often should I fertilize my bishop's crown pepper plants?
During the growing season, fertilize your bishop's crown pepper plants every two weeks with a balanced, water-soluble fertilizer.
Can I save seeds from my bishop's crown peppers for next year?
Yes, you can save bishop's crown pepper seeds for next year’s planting. Make sure to dry the seeds thoroughly before storing them in a cool, dry place.
Are bishop's crown peppers perennial or annual plants?
bishop's crown peppers are typically grown as annual plants, but in warmer climates, they may behave as perennials.